【wordpress自作テーマ作り】その5:記事内本文を作成する
記事本文をphpに置き換える

今までは、ブログの内容よりも外側の部分を作ってきました。
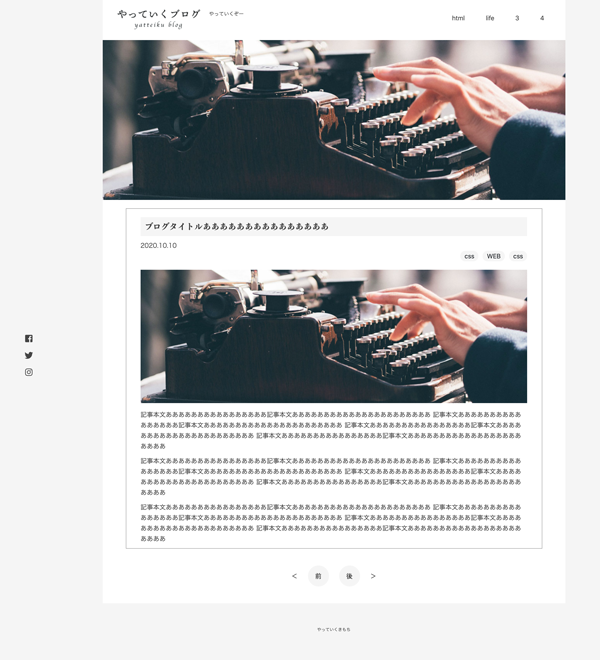
ここでようやくpage.htmlとして作っていた記事本文ページをsingle.phpに置き換えます。
<!DOCTYPE html>
<html>
	<head>
		<script type="text/javascript" src="http://ajax.googleapis.com/ajax/libs/jquery/1.3.2/jquery.min.js"></script>
		<title>やっていくブログ</title>
		<meta charset="UTF-8">
		<meta name="description" content="WEBをやっていくぞー">
		<meta name="viewport" content="width=device-width, initial-scale=1, shrink-to-fit=no">
		<meta name="robots" content="noindex">
		<meta name="robots" content="nofollow">
		<link href="https://use.fontawesome.com/releases/v5.6.1/css/all.css" rel="stylesheet">
		<link rel="stylesheet" type="text/css" href="css/reboot.css">
		<link rel="stylesheet" href="css/page-style.css">
		<script src="https://ajax.googleapis.com/ajax/libs/jquery/2.2.0/jquery.min.js"></script>
	</head>
	<body>
		<div class="wrapper">
			<header>
				<div class="rogo">
					<h1><img src="images/rogo.png"></h1>
					<p>やっていくぞー</p>
				</div>
				<input type="checkbox" id="navTgl" class="none">
				<label for="navTgl" class="open"><span></span></label>
				<label for="navTgl" class="close"></label>
				<nav>
					<ul>
						<li>html</li>
						<li>life</li>
						<li>3</li>
						<li>4</li>
					</ul>
				</nav>
			</header>
			<section>
			<div class="main">
				<div class="main-visual">
				</div>
			</div>
			</section>
			<main class="clearfix">
				<section>
					<div id="content">
						<div class="kiji">
							<h2>ブログタイトルあああああああああああああああ</h2>
							<p><time>2020.10.10</time></p>
							<div class="category">
								<div class="btn2 btn">css</div><div class="btn2 btn">WEB</div><div class="btn2 btn">css</div>
							</div>
							<div class="thumbnail">
								<img src="images/main-visual.jpg" alt="">
							</div>
							<div class="honbun">
								<p>記事本文ああああああああああああああああ記事本文ああああああああああああああああああああああ
								記事本文ああああああああああああああああ記事本文ああああああああああああああああああああああ
								記事本文ああああああああああああああああ記事本文ああああああああああああああああああああああ
								記事本文ああああああああああああああああ記事本文ああああああああああああああああああああああ</p>
								<p>記事本文ああああああああああああああああ記事本文ああああああああああああああああああああああ
									記事本文ああああああああああああああああ記事本文ああああああああああああああああああああああ
									記事本文ああああああああああああああああ記事本文ああああああああああああああああああああああ
									記事本文ああああああああああああああああ記事本文ああああああああああああああああああああああ</p>
									<p>記事本文ああああああああああああああああ記事本文ああああああああああああああああああああああ
										記事本文ああああああああああああああああ記事本文ああああああああああああああああああああああ
										記事本文ああああああああああああああああ記事本文ああああああああああああああああああああああ
										記事本文ああああああああああああああああ記事本文ああああああああああああああああああああああ</p>
							</div>
						</div>
						<div class="pagination">
							<ul>
								<li><</li>
								<li><a class="circle" href="~">前</a></li>
								<li><a class="circle" href="~">後</a></li>
								<li>></li>
							</ul>
						</div>
					</div>
				</section>
			</main>
			<footer>
				<div class="box8">
					<p class="small">やっていくきもち</p>
					<div class="sns">
						<ul class="social">
							<li class="facebook"><a href=""><i class="fab fa-facebook-square"></i></a></li>
							<li class="twitter"><a href=""><i class="fab fa-twitter"></i></a></li>
							<li class="instagram"><a href=""><i class="fab fa-instagram"></i></a></li>
						</ul>
					</div>
				</div>
			</footer>
			<!--jQuery-->
			<script src="https://ajax.googleapis.com/ajax/libs/jquery/1.11.0/jquery.min.js"></script>
		</div>
	</body>
</html>
<?php get_header(); ?>
<body <?php body_class(); ?>>
<main class="clearfix">
<section>
<div id="content3">
<?php
if( have_posts() ):
while ( have_posts() ) : the_post(); ?>
<article id="post-<?php the_ID(); ?>"<?php post_class('entry'); ?>>
<div class="kiji">
<h2><?php the_title(); ?></h2>
<p><time datetime="<?php the_time('y-m-d'); ?>"><?php the_time('Y年m月d日'); ?></time></p>
<div class="category">
<?php the_category();?>
</div>
<div class="thumbnail">
<?php if (has_post_thumbnail() ):?>
<a href="<?php the_permalink(); ?>"><?php the_post_thumbnail('single-thumbnail'); ?></a>
<?php else: ?>
<a href="<?php the_permalink(); ?>"><img src="<?php echo get_template_directory_uri(); ?>/images/common/noimage_.png" alt=""></a>
<?php endif; ?>
</div>
<div class="honbun">
<?php the_content(); ?>
<?php get_template_part( 'sns' ); ?>
</div>
</div>
<?php
endwhile;
endif;
?>
<div class="pagination2">
<ul>
<li><?php previous_post_link('%link'); ?></li>
<li><?php next_post_link('%link'); ?></li>
</ul>
</div>
</div>
</section>
</main>
<?php get_footer(); ?>ヘッダー・フッターを呼び出す
ここらへん同じです。bodyの部分は、<?php body_class(); ?>を入れ子にしてbodyのクラスをつけます。
記事本文作り
メインループ で記事をはさむ
メインループ って使いまわせるんですって!
というわけで、こちらでも説明したネタをもう一度やります。
挟む部分は<section><div id=”content”>〜</div></section>
でOK
<?php if ( have_posts() ):
							while ( have_posts() ) : the_post(); ?>
(本文:<section>〜</section>)
<?php endwhile;
					endif; ?>
<?php if ( have_posts() ):←もしこのページに記事があるなら
while ( have_posts() ) : the_post(); ?>←記事とりにいきます。
<?php endwhile;←もしこのページに記事がないなら
endif; ?>←ループ終了します。
<article id=”post〜で記事を装飾するとっかかりを作る
<article id="post-<?php the_ID(); ?>" <?php post_class('kotei-kiji'); ?>>title、サムネイルなどループ内の要素を置き換えていく
すごい既視感。こちらでも説明したネタなので省きます。
本文を表示する
記事一覧ページ(index.php)と記事本文ページ(page.php)の最大の違いはここかもしれない。文中の「あああああああああああああああ」のところを、<?php the_content(); ?>と置き換えることによって本文を表示させます。
<div class="honbun">
	<?php the_content(); ?>
</div>
記事一覧ページ(index.php)のときは、<?php the_excerpt(); ?>で本文の引用を、<a href=”<?php the_permalink(); ?>”>続きを読む</a>で本文に飛ばすようになってました。
ページネーション を作らなきゃいけないんだけど、もういいよね。
ここ見てください。
シェアボタンを作成する
この記事の末尾に「SHARE THIS POST」って書いたSNSへの紹介ボタンがあるのですが、紹介してください。
……ではなくて、シェアするボタンを作っていきます。
sns.phpという名前で空のファイルを作ります。
そこへ下記のコードを追加してください。
<?php
$url_encode=urlencode(get_permalink());
$title_encode=urlencode(get_the_title()).'|'.get_bloginfo('name');
?>
<div class="sns-kiji">
	<p>SHARE THIS POST</p>
	<ul>
		<!--Facebookボタン-->
		<li></li>
		<li class="facebook">
		<a href="//www.facebook.com/sharer.php?src=bm&u=<?php echo $url_encode;?>&t=<?php echo $title_encode;?>" onclick="javascript:window.open(this.href, '', 'menubar=no,toolbar=no,resizable=yes,scrollbars=yes,height=300,width=600');return false;">
		<i class="fab fa-facebook-square fa-2x"></i>
		</a>
		</li>
		<!--ツイートボタン-->
		<li class="twitter">
		<a href="//twitter.com/intent/tweet?url=<?php echo $url_encode ?>&text=<?php echo $title_encode ?>&tw_p=tweetbutton" onclick="javascript:window.open(this.href, '', 'menubar=no,toolbar=no,resizable=yes,scrollbars=yes,height=300,width=600');return false;">
		<i class="fab fa-twitter fa-2x"></i>
		</a>
		</li>
	</ul>
</div>
Font AwesomeのCDNコードを追加する
話が前後しちゃってマジすいません。
SNSのアイコンにFont Awesomeのアイコンを追加したい場合は、header.phpにFont AwesomeのCDNコードを追加してください。
(わたしの技術レベル的にfunctionに追加する設定だとうまく動かなかったので、ここだけheader.phpに記述しています)
Font Awesomeとは
WEB上で使えるアイコン画像です。htmlとcssに記述するだけでアイコンが出てきます。
いちいち画像をアップする手間が省けて便利だし軽い。
一つ前のヴァージョンは、CDNコードをコピペしてcssを呼び出すときみたいにLINKタグでつなぐだけでよかったんだけど、最近のアイコンはメールで登録しないと使えないようになってしまった(無料)
https://fontawesome.com/(公式サイト)
【保存版】Font Awesomeの使い方:Webアイコンフォントを使おう(サルワカさんの記事)
<? php$url_encode=urlencode(get_permalink());$title_encode=urlencode(get_the_title()).’|’.get_bloginfo(‘name’);?>
とりあえず書いておくべき項目。私も謎。
<?php get_template_part( 'sns' ); ?>sns.phpを呼び出す。single.phpのソーシャルボタンをおきたい場所に書いてください。
その際のcss装飾はこれ。
記事の変な部分に出現しちゃったら、じりじりとcssの装飾で定位置に移動させてゆくと良いと思います。
/*SNS*/
.sns{position: absolute;
    left: -2%;
    top: 50%;}
.social{width: 210px;
    height: 40px;
    text-align: center;
    margin: (40px * 0.5);
    padding: 0;
    position: fixed;}
.social li{list-style-type: none;
    margin: 0 0 0 -10px;
    padding: 0;}
.social a{text-align: center;
    color: #444444;}
.social i{display: inline-block;
    font-size: 0;
    line-height: 1;
    padding: 10px;
    width: 40px;
    height: 40px;
    border-radius: 50%;
    text-align: center;
    position: relative;
    color: #444444;
    z-index: 1;}
.social i:before{font-size: 20px;
    z-index: 2;
    position: relative;}
.social i:after{opacity: 0;
    position: absolute;
    left: 0;
    top: 0;
    width: 100%;
    height: 100%;
    border-radius: 100%;}
.facebook i:hover{color: #3b5998;
    transition: .5s;}
.twitter i:hover{color: #55acee;
    transition: .5s;}
.instagram i:hover{color: #3b5998;
    transition: .5s;}

